Running the Gamestonk Terminal on an Apple M1
The Gamestonk Terminal is an open-source, Python-based, meme stock version of Bloomberg Terminal created by Didier Rodrigues Lopes, et al. If you are familiar with using virtualenv, installing and running the Gamestonk Terminal is rather straight-forward –except if you have an Apple M1 machine. Installation generally goes well on an Intel/x86-64 Mac, but not on M1/ARM64. You will run into architecture problems when installing Python packages including cvxpy, numpy. The workaround is to install all packages as Intel/x86-64 format, and run the Gamestonk Terminal in the Terminal app with Rosetta mode enabled.
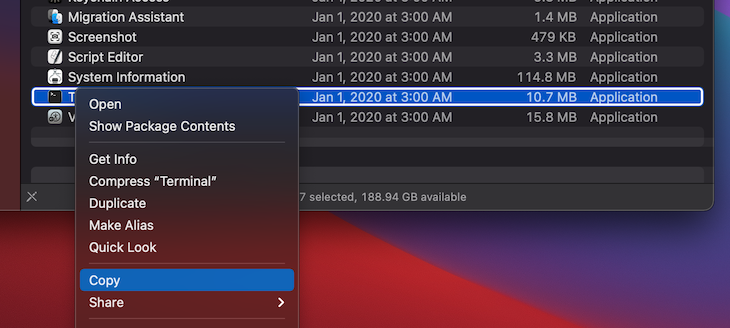
Step 1: Make a copy of the Terminal app in /Applications/Utilties. I use the Terminal app heavily, and I also like running almost everything natively. Because we need Terminal to install and run x86-64 content, it is best to do a separation of concerns. You can make a copy of the Terminal app, rename the copy of the app (in this case, to “Gamestonk Terminal”).

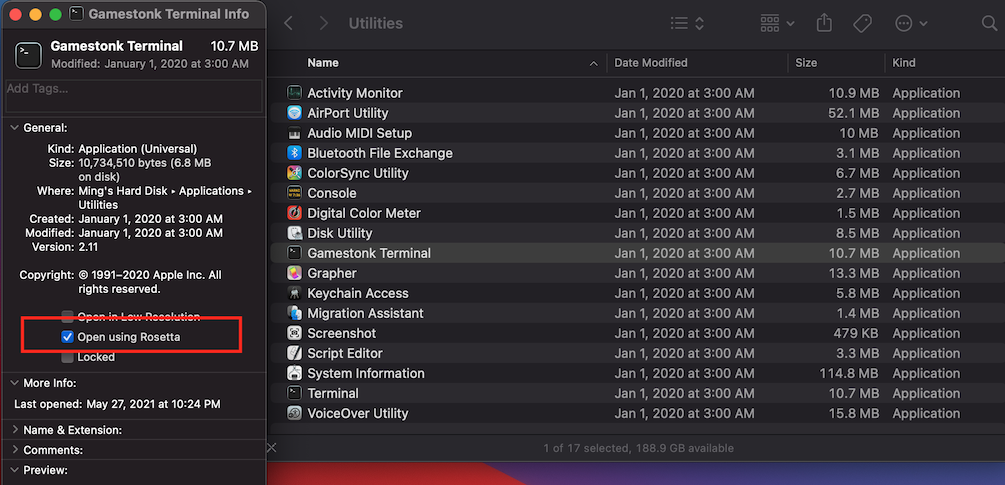
Step 2: In the copy of the Terminal app that was made, right-click on the app, go to “Get Info”, and check off the “Open in Rosetta” box.

Step 3: Open the copy of the Terminal app that was made.
Step 4: Run git clone https://github.com/DidierRLopes/GamestonkTerminal.git
Step 5: Navigate into the project’s folder: cd GamestonkTerminal
Step 6: Install virtualenv via macOS Python3 in x86-64 architecture arch -x86_64 /usr/bin/python3 -m pip install --user --upgrade virtualenv
Step 7: Create a virtual environment for the project in x86-64 architecture: arch -x86_64 /usr/bin/python3 -m virtualenv env
Step 8: Activate the project’s virtual environment: source env/bin/activate
Step 9: Install the dependencies and requirements for the project –everything in x86-64 architecture: arch -x86_64 pip install -r requirements.txt
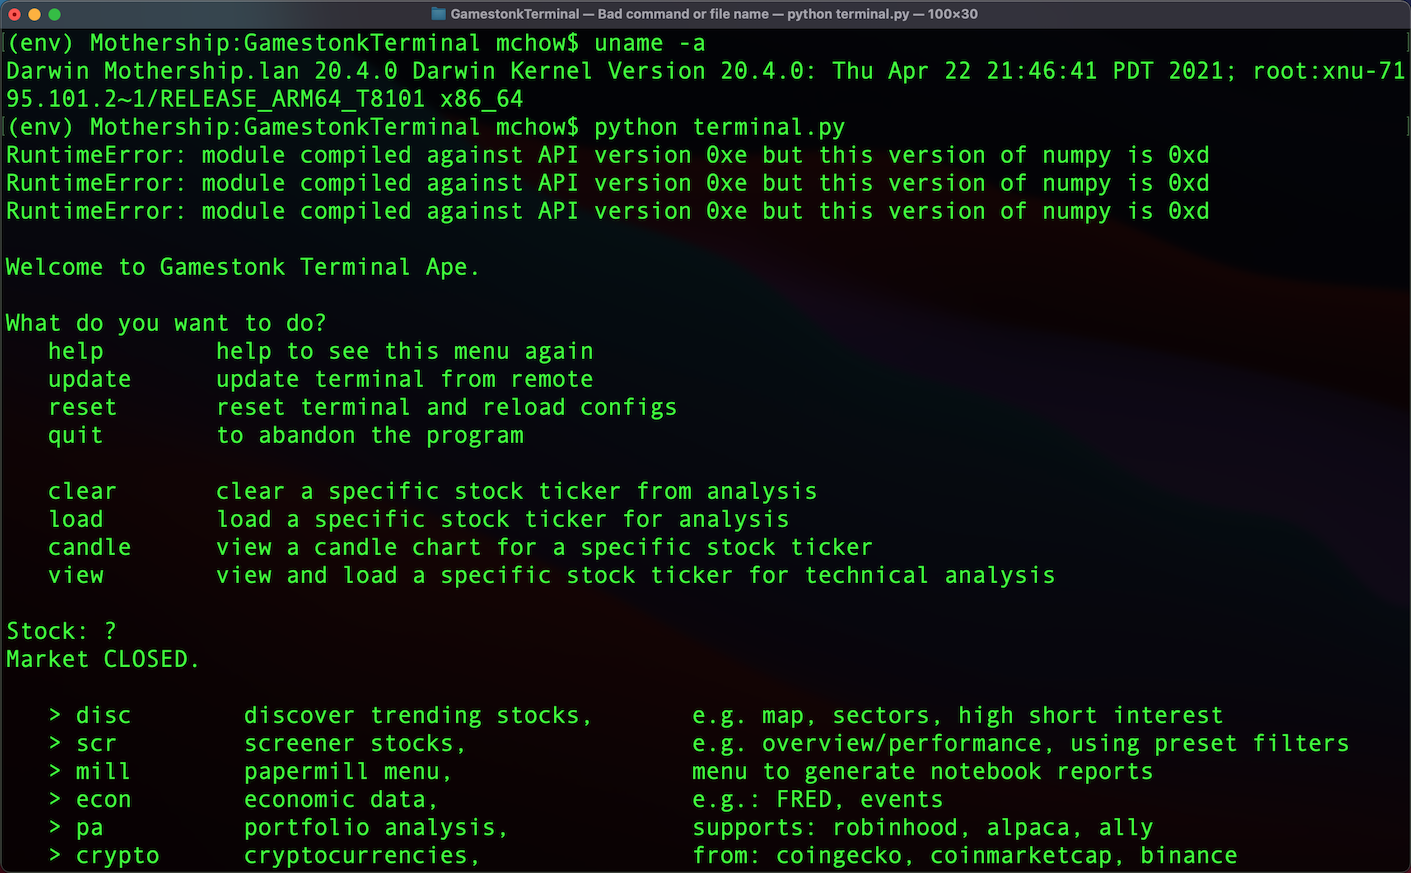
Step 10: After all the dependencies and requirements are installed successfully, run the Gamestonk Terminal: python terminal.py
